A complex molding wrapped around a simple reflection
Overall dimensions: 11 1⁄2"w × 1"d × 22 1⁄2"h
In the late 18th century, mirror glass was a coveted home accent, not just for checking one’s appearance, but for its ability to amplify available light and brighten dim interiors. Only the wealthiest could afford large mirrors; ordinary folks were lucky to own a few square inches.
Proud owners would hire local woodworkers to frame their prized possession. Skillfully using materials on hand, these craftsmen tried to replicate the elaborate carvings and exotic woods used on the finest furniture. Their work was later known as Country Chippendale. (Because the glass was worth more than the frame, mirror frames were often replaced to reflect the latest style.)
Living and teaching in Philadelphia, I have a special appreciation for these New World craftsmen. Keeping with their spirit, I built this Country Chippendale frame from curly maple. Unlike some originals, this design will pass the test of time. The mirror can complement a traditional room or serve as an interesting accent in a modern setting.
This project offers the perfect excuse to make use of that special board you’ve stashed in the corner of your shop. In addition to showcasing the mirror glass, the frame gives you an opportunity to show off your skills at routing complex moldings, making accurate miters, and cutting elegant scrollwork.
The project also offers a chance to experiment with glazing. This finishing technique involves laying a darker stain on top of the finished piece to imitate the accumulation of dirt, wax, and mild grime that occurs over time. The technique helps accentuate the moldings.


Tip Alert
Prepare the frame stock
1 From 1" (4/4) stock, mill at least 5 linear feet of frame stock to 3⁄4 × 1 3⁄8". (If your material permits, mill an extra foot or two, as an extra piece might come in handy.) Make sure the material is square, flat, and straight. You can cut the stock into shorter, more manageable lengths of 18" for the sides (A) and 14" for the top and bottom (B).
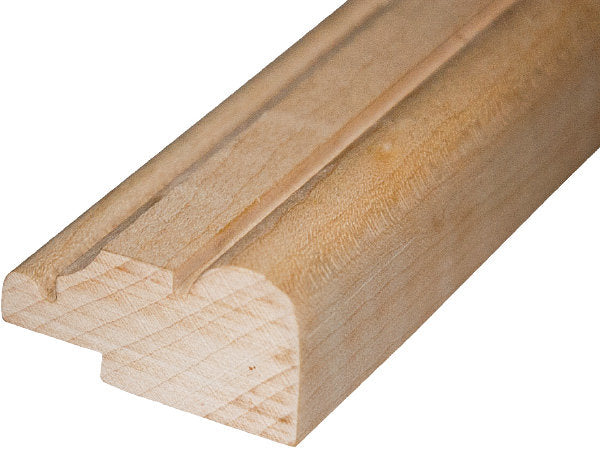
2 At the router table, mill the frame stock as described in “Making a Multistep Molding” on page 41.

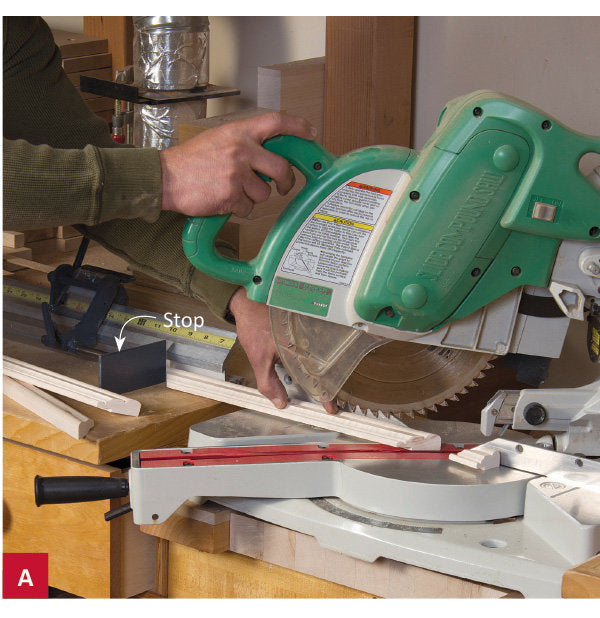
3 Using a mitersaw, miter the ends of the sides (A) and top and bottom pieces (B) to the lengths listed in the Cut List and as shown in Photo A.
4 Using the inside edges of a reliable square, butt the mating ends together to make sure that the corners fit together precisely. If you see a gap, you can adjust the miters using a hand plane and shooting board or a power sander outfitted with a jig like the one shown in Photo B.
5 Temporarily glue wood blocks to the outside edges of the frame pieces, about 3⁄4" from the end to establish parallel surfaces to draw the corners together. (Placing brown paper between the blocks and the frame will ease removal later.) Now test-fit the frame to check the assembly for square and for tight joints (Photo C). If necessary, adjust the profiles with a shoulder plane or small sanding block to create a neat match at the miters.

Making a Multistep Molding
Traditionally, complex molding profiles were made with molding planes, but you can produce similar results with a table-mounted router. And, just as woodworkers of yore created a variety of profiles using just a few planes, you can do the same using just a few router bits. The profile on this mirror frame provides a great example.

Step 1
Start with 3⁄4 × 1 3⁄8" stock. Using a 1⁄4" straight bit, rout a 1⁄2 × 3⁄16"-deep rabbet on the inside face to receive the mirror glass and backing board.

Step 2
Reposition the bit, fence, and stock to rout a 1⁄4 × 1⁄4" rabbet along the opposite face to make step 3 easier.

Step 3
Install a 3⁄8"-diameter core box bit and adjust the bit height to 1⁄2". Adjusting the fence as necessary, rout in incrementally deeper passes (to avoid tear-out) until the cut reaches the inside corner of the 1⁄4 × 1⁄4" rabbet.


Step 6
At the tablesaw, remove 1⁄8" from the flat between the 1⁄2" bead and the cove. Use a featherboard to keep stock against the fence and a pushstick to keep your fingers clear of the saw blade.

6 Apply glue to both faces of each miter corner, and clamp the frame together. Double-check the molding profiles at the miters before the glue sets.
7 When the frame is dry, remove the clamps and cut away the clamping blocks. Use a hand plane and/or a sanding block to remove any traces of glue or paper.
8 Referring to Photo D, build a cradle jig to support the frame at 45° as it passes over the tablesaw blade. This jig is nothing more than an L-shaped ledge mounted on a plywood panel at 45° to the top of the saw.
Tip Alert
9 Adjust the rip fence to cut a spline slot 3⁄16" in from the frame’s rear face. Then, making test cuts in scrap, raise the blade until the resulting slot extends 1 1⁄2" from the frame corner, as shown in Figure 1. To cut the spline slot, hold the frame firmly in the cradle jig and push it across the blade. Rotate the frame and repeat the process to cut the remaining slots (Photo D).
10 Thickness the spline material to fit the slots. Aim for a snug fit, but allow for the slight swelling that may occur when gluing up. (I prefer to cut stock to a fat 1⁄8", and then bring it down to press-fit thickness with a block plane.) Size the individual splines to be about 1⁄2" longer and 1⁄4" wider than the slots.

11 Apply glue in the slots, and insert the splines, making sure that each one completely contacts the bottom of its slot. When the glue dries, carefully trim the splines flush with a handsaw or bandsaw. Finish up with a block plane, and then sand smooth.
Add the crest and drop
1 Referring to Figure 1, lay out the stopped groove on the top and bottom of the frame. Install a 1⁄4"-diameter bit into your table-mounted router, and then set your router table fence 1⁄4" from the bit. With the back of the frame against the fence, rout the grooves, as shown in Photo E. Make the 1⁄4"-deep groove in steps, removing about 1⁄8" with each pass.

2 Select a showy piece for your decorative crest (C) and drop (D). Using the half-patterns, trace the full crest and drop onto your stock. Next, drill out the circles on the drill press.
3 Outfit your scrollsaw with a smooth-cutting blade, and saw along the line (Photo F). If necessary, you can use a fine file to remove any saw marks and to fair the curve. (Angle the file slightly to avoid chipping the back edge on the forward stroke.) Finally, finish-sand the faces and edges through 220 grit.
4 Apply glue to both grooves, and insert the crest and drop pieces. Hold them in place with thick rubber bands (Photo G) until the glue sets.


Finishing touches
1 Finish-sand the mirror through 220-grit, and then wipe it with denatured alcohol to reveal any surface flaws. Lightly burnish the molding profiles with a maroon nonwoven abrasive pad.
2 Apply stain to accentuate the wood’s figure. (I used honey amber TransTint mixed with alcohol.) When the stain has dried, buff the surface with a maroon nonwoven abrasive pad to knock off any raised fibers. Next, brush on two thin coats of 2-lb.-cut orange shellac. When dry, rub out the shellac with a maroon pad.
3 Using a small brush, work glazing liquid into the corners and creases of the moldings and the edges of the crest and drop. Allow about 15 minutes for the glaze to set up slightly, and then rub off the excess. Leave some material in the recesses to accentuate the molding’s shape. (If you remove too much, simply reapply more glaze.) Allow at least an hour for the glaze to dry thoroughly, and then burnish the molding details with a clean rag.
4 Apply black latex paint to the frame rabbet (Photo H) so its reflection in the mirror doesn’t draw attention.
5 Cut your glass 1⁄8" smaller than the rabbeted opening. Insert the mirror and a similarly sized piece of cardboard or kraft paper to serve as padding. Adjust the thickness of the padding so that it’s flush with the frame’s back face. Cut the back (E) from 1⁄4" plywood, and attach it to the frame with #6 × 1⁄2" brass flathead countersunk screws.

About Our Author
A custom furnituremaker for over 35 years, Mario Rodriguez now spends much of his time teaching aspiring woodworkers at the Philadelphia Furniture Workshop. He is the author of Traditional Woodwork and Building Fireplace Mantels (Taunton Press).
