Getting a grip on the essentials
When you get your hands on a router for the first time and turn it on, it’s easy to be intimidated by the power that jumps to life in that small package. But once you learn to wrangle the little beast, you get to be fast friends as you realize all the tricks it can do, from shaping profiles and cutting joints to making perfect shapes and identically sized multiples.
Mastering the router starts with knowing how to set up the tool and guide it. Regardless of whether you’re using a fixed-base router or a plunge router, successful work means getting clean cuts located exactly where you want them. There are two basic approaches to routing. The first is handheld routing, which is taking the tool to the work. The second is mounting the router in a table, in which case you’re bringing the work to the tool. Each approach has its advantages and disadvantages. In this article, we’ll focus on handheld routing, covering the fundamentals of tool setup, proper feeding technique, and basic router guidance for making common cuts.
A Bit About Bits
Clean cuts depend first of all on using sharp, good quality bits. Carbide is the order of the day here. Don’t expect high-speed steel (HSS) bits to keep their edges for long. Also, avoid suspiciously inexpensive bits, which are often poorly machined from inferior materials.
Many bits are available with either a 1⁄4"- or 1⁄2"-diameter shank, and most routers these days include interchangeable collets to allow use of either size. Select the larger shank when possible. It provides a better grip in the collet, and the extra mass minimizes chatter, especially on long or large bits. A notable exception here is a bit used for mortising. In that case, it’s best if the shank is the same size or smaller than the diameter of the fluted area, because it allows you to plunge deeper than the fluted section.

Setting up
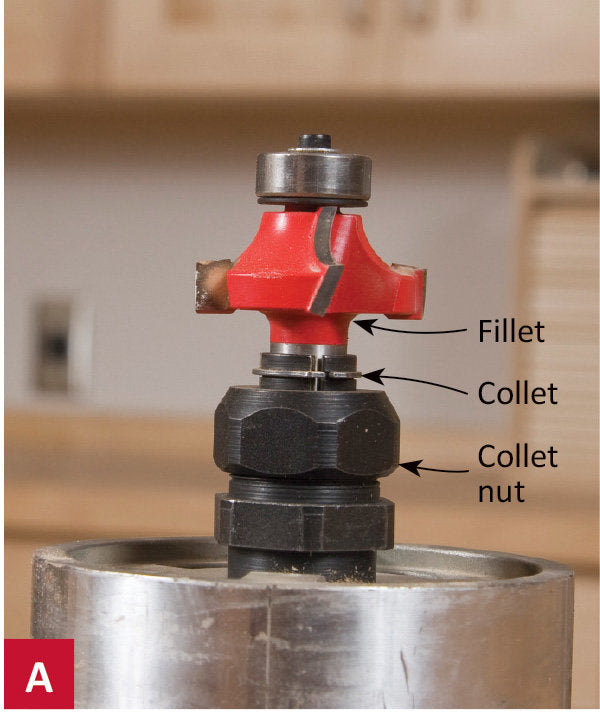
First things first: installing a bit. To ensure a good grip, don’t let a bit drop fully down in the collet recess before tightening it. If the shank touches the bottom of the recess, tightening the collet nut may then jam the end of the shank against the bottom of the recess, making removal difficult. To prevent the problem, raise the bit 1⁄8" or so before tightening the collet. If the top of the cutter is allowed to sit on top of the collet, the rounded fillet may prevent the collet from fully tightening on the shank (Photo A). Again, lift the bit slightly before tightening the collet.
When tightening a collet nut, there’s no need to bear down with killer pressure. If two wrenches are required for the job, squeeze them together with one hand as shown in Photo B to achieve proper tightness. To loosen the nut, reverse the wrench positions.
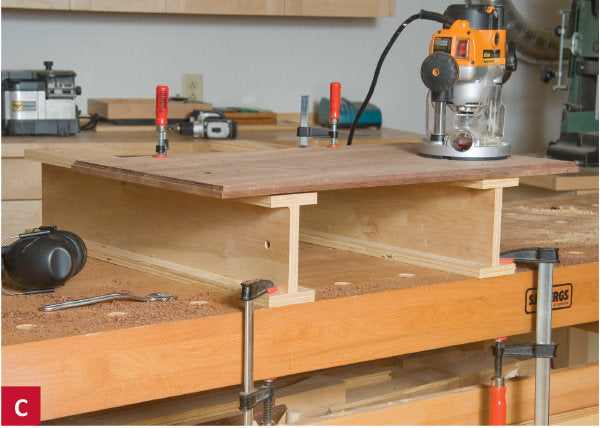

Securing the workpiece can be as important as securing the bit. Work that shifts or slides around invites miscuts and possible injury. Use a vise, clamps, bench dogs, or whatever suits the piece. I-beam risers work great for holding panels up off the bench (Photo C). By clamping the risers to the bench, and the work to the risers, you can work at a more comfortable height, while a bit projecting below the panel is largely unobstructed. A portable router rest provides a protective platform for bits, as well as convenient storage for wrenches and bits in play (Photo D).
Feeding a router
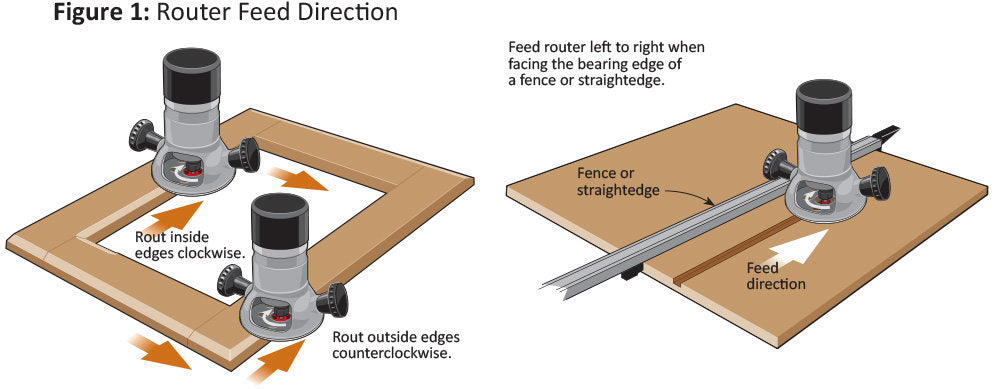
For a bit to cut as intended, the router needs to be fed in the correct direction, as shown in Figure 1. Proper feed direction ensures that the rotation of the bit pulls it against the workpiece edge (in the case of a bearing-guided bit) or against a fence. Feeding in the opposite direction (called climb-cutting) causes the bit to push the router away from the edge or fence, resulting in an erratic cut. Climb-cutting does have its uses, as explained in the sidebar at left, but should only be used with bearing-guided bits, not with a fence.
Proper feed speed depends on the bite, the bit, and the density of the wood. Don’t try to hog off too much at once, especially in dense wood, or you risk bit chatter or breakage. As a general rule, when dadoing, grooving, or mortising, take a series of 1⁄4"-deep passes to get to the final depth you want. Most profiles can be cut in a single pass, but sometimes the cleanest profile is achieved with a first pass a hair shy of final depth, finishing up with a very light cut. This is a particularly good approach when routing woods that are prone to tear-out or scorching.


When dadoes intersect a rabbet, rout the rabbet last so it will remove any cross-grain tear-out.
Pay attention to the sound and feel of the tool as you cut. If it seems to be straining, take a lighter cut and/or decrease your feed rate. Try to feed at a consistent speed; neither so fast that you stress the bit, nor so slow that you risk burning the wood. If you’re relatively new to routing, the best thing you can do is to practice on scrap before laying into your project wood. Ideally, use scrap of the same species or density.
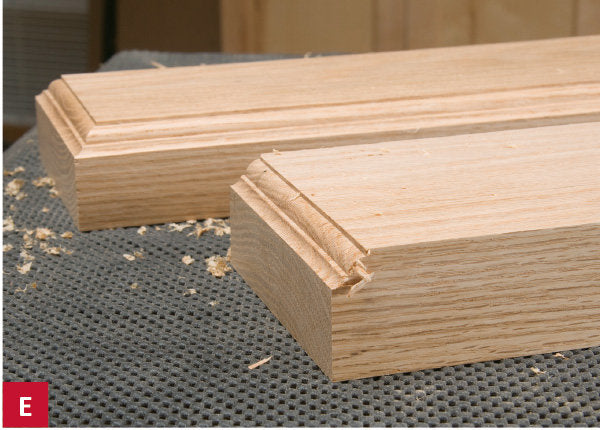
No matter how carefully you feed, the unsupported fibers at the end of a cross-grain cut are likely to blow out to some degree. When routing profiles, make it a practice to rout the end-grain edges of a workpiece first. The subsequent long-grain cuts will remove any tear-out (Photo E).
If an adjacent long-grain edge isn’t to be routed, you can back up the profile cut with a piece of scrap to eliminate tear-out (Photo F). When routing a dadoed board that terminates into an edge rabbet, as in common cabinet joinery, cut the dadoes first, as the subsequent rabbet will remove any tear-out (Photo G).
The Climb-Cutting Controversy
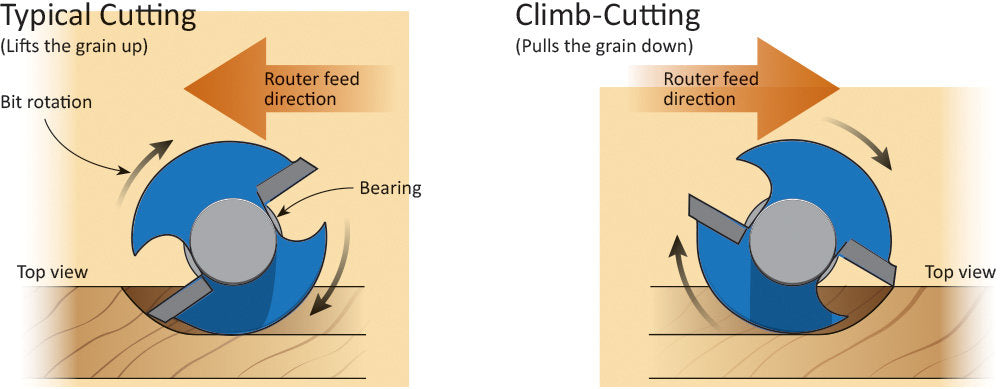
Climb-cutting means feeding a router “backwards” from the usual direction shown in Figure 1, above.
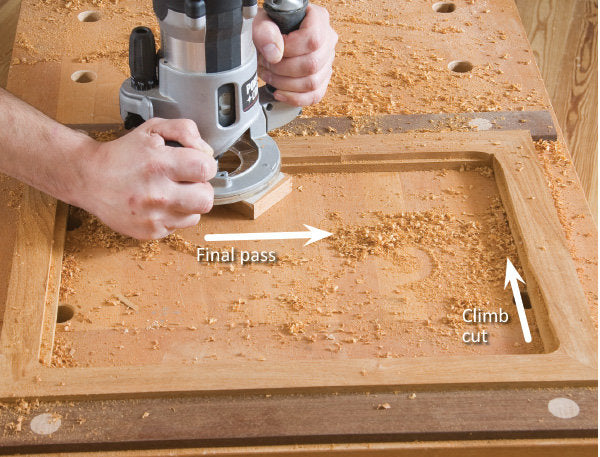
Some woodworkers argue against this operation because it causes the router to self-feed, compromising control. However, climb-cutting can be valuable in that it eliminates tear-out because the bit is cutting downhill to the grain instead of lifting it up, as shown in the drawings below. For example, rabbeting the back of a picture frame often causes tear-out along the inner edge. To eliminate the problem, set your bit for full depth of cut, and then climb-cut for the first pass, disregarding neatness. Then follow up with a cut in the regular direction, as shown in the photo.
Check it out yourself next time you’re experiencing tear-out. Just make sure when climb-cutting to hold the router very firmly against the edge of the workpiece as you rout, and always finish up with a pass in the regular direction.
Guiding a router
A router is seldom guided freehand. Its travel is usually directed by the pilot bearing on a bit, a template-guided bushing, or by a fence or edge guide. The approach you take depends on the availability of a suitable bit, the location of the cut on a workpiece, and whether you’re using a template or not.


A guide bushing runs along the edge of a template, allowing routing of hinge mortises and other shaped recesses.
Let the bit be your guide
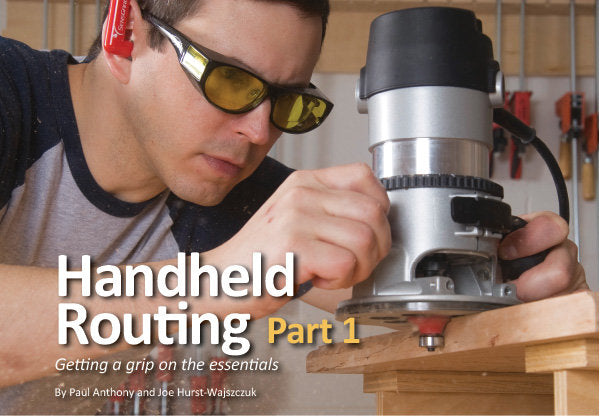
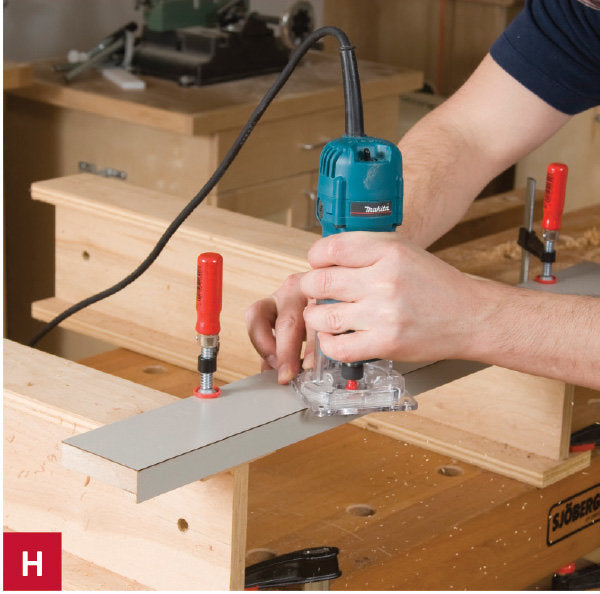
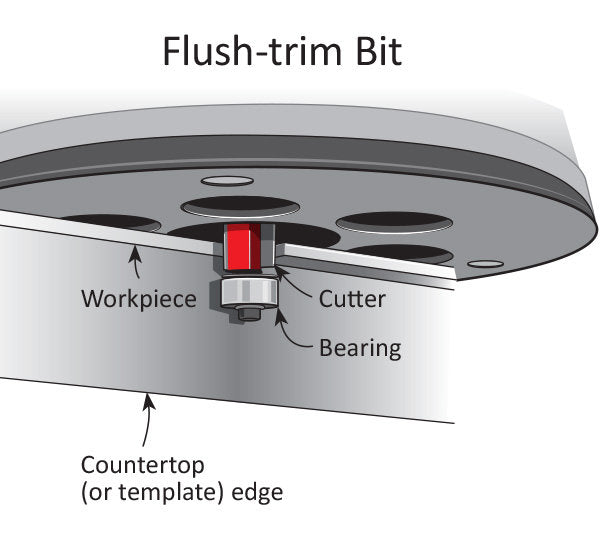
A bearing-guided bit is a great option for precisely controlling a cut. The bearing on most bits sits below the cutter. This is the case with most profile bits, such as the one in the lead photo at the top of the article, as well as rabbeting bits, slot cutters, and others. The bearing rides along the edge of the workpiece, while the cutter above does the shaping work. A flush-trim bit is basically a straight bit with a bottom-mounted bearing whose diameter is just a few thousandths of an inch larger than the cutting diameter of the bit. This makes it the perfect choice for routing two surfaces flush to each other for operations like trimming laminate (Photo H). A pattern bit has a top-mounted bearing, which is designed to follow a template attached to the top of a workpiece (Photo I).
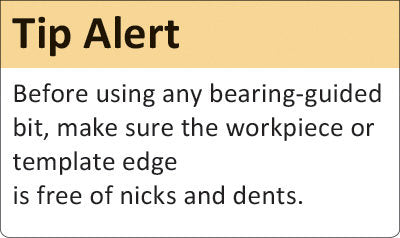
When using bearing-guided bits, it’s important to prevent the router from tipping. To keep it flat, orient one handle over the workpiece, applying firm downward pressure as you work. When rounding a corner, rotate the router to maintain handle orientation and downward pressure over the workpiece. With a flush-trim bit, adjust the bearing so that it rides only 1⁄16" or so below the top edge of the reference surface. That eliminates the possibility of the cutting flute scoring the surface.
Keep in mind that flush-trim bits and pattern bits aren’t designed to hog a lot of material. With the exception of plastic laminate and other thin materials, a workpiece should first be rough-cut (usually with a saw) to within 1⁄16" or so of the final edge before routing.
Guide bushings for template routing
Guide bushings (also called template guides) are metal collars that attach to a router’s sub-base. In use, a bit (usually straight) projects through the bushing, which rides along the edge of a template that’s fixed to the top of the workpiece. Bushings are available in a variety of sizes to accommodate bits of different diameters.
Bushings are ideal for template-routing hinge mortises and other recesses (Photo J). You can also use them to create multiple identically-shaped parts in much the same fashion as you would use a pattern bit. However, when making a template, you’ll need to account for the offset between the edge of the bushing collar and the cutting diameter of the particular bit you’re using.


Using a fence
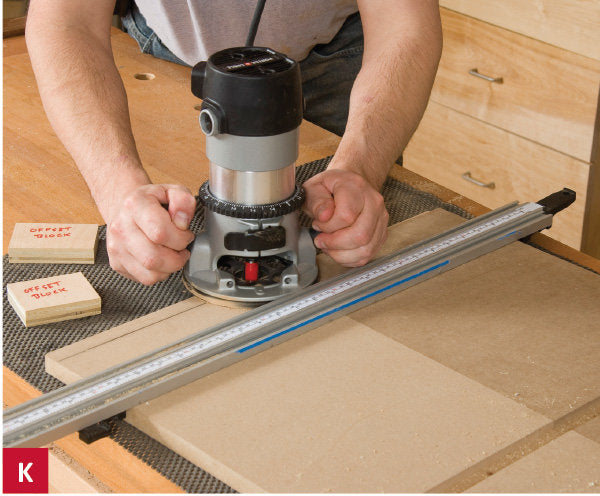
One of the simplest router guidance methods is to run the edge of the base along a straightedge fence fixed to the workpiece. You can use a jointed piece of wood or a proprietary self-clamping straightedge like the one shown in Photo K above. To set up the cut, draw a cutline on the workpiece, measure from the edge of the router base to the cutting perimeter of the bit, and then place the fence that distance from the cutline. For fast, efficient setup of multiple cuts made with the same bit, make up a couple of offset blocks to the distance required.
When routing against a fence, feed direction is important in order for the bit to pull the router against the fence instead of causing it to veer away. Always feed the router left to right as you face the bearing edge of the fence. Never climb-cut against a fence.

Edge guides
An edge guide is basically an accessory fence that attaches to the base of a router via one or two extension rods. The fence attaches to the body of the edge guide, which can be adjusted to any location on the rods and then locked in place.
The fence rides along the edge of the workpiece to guide grooves, dadoes, mortises, and other cuts (Photo L). An edge guide fence typically extends about 8" from the bit, which is useful for routing grooves relatively near the edge. However, it doesn’t have enough reach to cut most shelf dadoes and other joints near the center of larger workpieces. One of the best uses for an edge guide is cutting accurate mortises in table legs and other furniture parts.
Most manufacturers offer proprietary edge guides for their particular routers. Better models are compact and include a tight locking mechanism and micro-adjustability. The body should include a notch at the center to accommodate the bit when shaping workpiece edges with non-bearing-guided bits.