
You can build these difficult drawers with help from power tools and proven tips.
Dovetailed drawers have long been a standard feature on fine furniture. Within this category of drawer construction, rabbeted, half-blind dovetail drawers are among the most challenging to build. The top and sides of the drawer front are rabbeted to overlay the drawer opening, and a delicate bead extends around all four edges of the drawer front. These are the drawers I had to build for the Shaker counter shown on p. 36. It’s hard to believe that woodworkers once built these drawers with hand tools alone. The techniques I’ll explain here will give you the look of hand-cut, half-blind dovetails, but with power tool assistance that saves time.

I usually build drawers entirely from solid wood. When thinking about drawer construction, I make allowances for the type of joinery at the front and back of the drawer. The joinery in the front is always the show joinery, while the joinery at the back is usually hidden. The drawers featured here have through dovetails at their back corners which I make using some of the same techniques applied to the front of the drawer (see drawing, facing page).
Start with the front
The drawer sides, bottom and back all derive their finished dimensions from the finished size of the drawer front, so it’s important to get the front dimensions right. To do so, measure the opening where the drawer will fit. In this case, I plan to rabbet the drawer front so that it overlays the opening by 1/4" on the sides and top. So I add 1/2" to the opening’s horizontal measurement, and 1/4" to its vertical measurement.
To prevent binding when the drawer opens and closes, I allow for 1/16" of clearance between each side rabbet and the opening, and slightly more clearance at the top rabbet.


Rabbet on the table saw. Bury the dado cutter in an auxiliary fence, and rabbet each front’s top and side edges.

Creep up on the perfect fit. Here I’m checking to make sure that I have 1⁄16" of clearance between each side rabbet and the opening. I’ll cut the top rabbet with slightly more clearance (between 3⁄32" and 1⁄8") to allow for greater cross-grain wood movement.
 Order of Work
- Cut drawer fronts to size and rout outside edges.
- Rabbet drawer fronts, then rip drawer sides to finished width.
- Complete front dovetails in sides.
- Complete pins in fronts.
- Cut sides to finished length.
- Cut backs to finished size and complete side-to-back joinery.
- Rout grooves for drawer bottom in fronts and sides.
- Assemble your drawers.
Now for the sides
When all drawer fronts have been rabbeted, you’ll be able to rip drawer sides to finished width. The rabbet’s depth gives you the base line to scribe on sides for their dovetails. After scribing all the sides, lay out dovetails with pleasing proportions (my tails are cut at 14°). Even though I’m making drawers in three different sizes, the bottom-most pin in each drawer will always be the same size. This enables me to mill the bottom groove in all fronts and sides with the same setup.


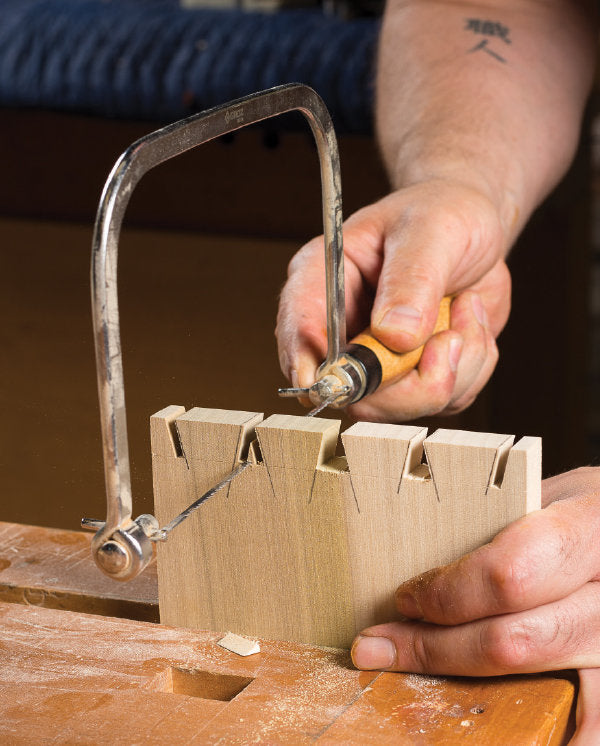
Cope with the waste. Cut slightly above your baselines, so that you can finish the joint by paring to the line with a narrow chisel.

Scribe, rout, and pare to make the pins
Creating pins that match your dovetailed sides begins with careful scribing. After darkening scribe lines with a pencil, you can rout sockets that require a minimum of paring, using a dovetail bit that matches the angle of your tails. Complete each joint by paring for a snug fit.


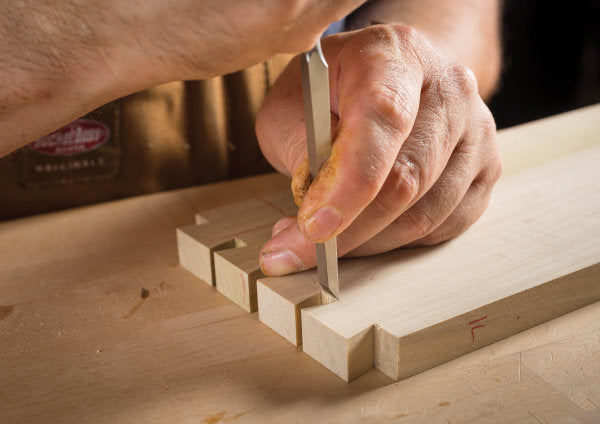
Chisel to fit. Pare away the waste that remains inside your layout lines, then test-fit and adjust as necessary.
Make the bottom fit, then finish the job
A solid wood drawer bottom requires more work than a plywood bottom, but it’s consistent with traditional drawer construction. Drawer assembly begins by gluing the sides and front together. The back goes on next, then the bottom.

