
With a little bit of time and patience with a slab of your wood choice, using a few finishing products and adding wood legs or leg hardware, can culminate into a beautiful piece of furniture that is sure to be the room's highlight and topic of conversation with family and guests in any home! In this project we delve into the making of a live edge walnut slab coffee table with some stunning grain.
You'll want to choose a slab that appeals to your decor or one that reacts to your senses and makes you go.... WOW, that's the one! Woodcraft.com and Woodcraft stores offer various choices of wood types and sizes. You can also find slabs sometimes at a lumber mill, cut and planed. We found this walnut slab ready to go at the 2019 Artistry in Wood Show from The Outdoor Living Group.
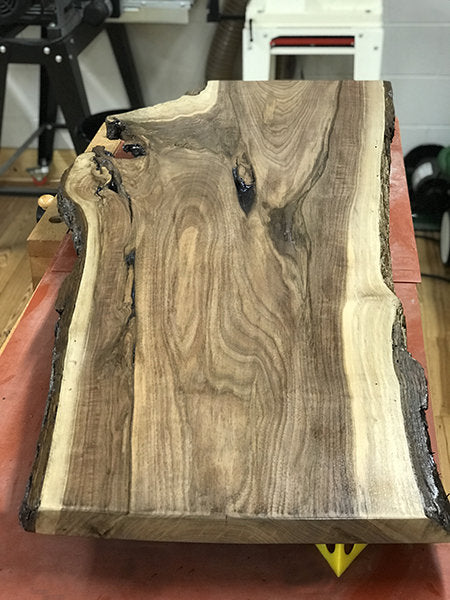
Bottom Surface

Top Surface
The decision as to which surface should be topside and which should be the bottom, wavered several times as the grain pattern on both were equally appealing. Which would you choose?
Both surfaces were pre-flattened at the sawmill before purchase. Flattening a large slab can be challenging, regardless of having a large planer or thickness sander, because one face of a slab still needs to be flattened before feeding it through one of these machines. You can hand plane a slab, or use a portable belt sander, but both are very labor intensive, and getting a perfect result may be difficult. Here are some detail links on planing a large slab with another choice, using a router sled.
Design aesthetic choices could include filling any gaps with dyed or clear resin and/or reinforce the gaps, splits or cracks with decorative butterflies, bows or other support designs.
Keeping the live bark edge or removing it with a draw knife for a natural or non-bark edge while still showing the sapwood contours of the tree, are two options as well. Live edge bark can also be milled off, peeled off, along with using a wire wheel followed by sandpaper to blend, soften and shape edges to meet the slab surfaces.

It is important to note when purchasing a slab to make sure it is kiln or air dried for at least a year. Ask when the tree was cut. The best bet to ensure that the bark will not fall off is to cut the tree during the dormant winter period when the sap has stopped running and the wood has hardened off. The bark is more adhered to the wood because sugar is not running through the sap edge. For additional information on air/kiln dried lumber and proper stacking, check out this Woodcraft Magazine online article.

That being said, it is also a good idea to apply Pentacryl, a preservation solution stabilizer to the wood. It will help reduce the shrinkage of the wood and prevent the wood from pulling away from the bark. Use Anchorseal or latex paint to seal the end grain which prevents moisture loss that causes the ends to crack, crook and warp. Slab ends dry out significantly faster than the rest of the board.
Finish Tips & Techniques

Use as many Pyramids to deflect the weight evenly across the length and width of your board.

Use a light across the project to highlight uneven finish and drips.

After sanding both surfaces with various grits working up to 320 using our Mirka Deros 5" Compact Orbital Sander, I used Painters Pyramids for drying space between the slab surface and the workbench top. Use as many Pyramids to deflect the weight evenly across the length and width of your board. The dimensions of this slab table are 55"L x 23"W x 1.625"H and weighs a little over 47 lbs.
Five coats of General Finishes Water Based HP Satin were foam brushed on all surfaces with sanding on the top and bottom surfaces in between dry times using a Norton Non-Woven Sanding Pad, White #0000.
Legs & Assembly
For the client's decor, she wanted cast iron legs with some historic or antique flair. These were found on ebay and are adjustable in height from 14" to 21" for a double application use for a coffee table or davenport. It seemed the price differences were relative to the historical value and location. These were from a schoolhouse in Providence Rhode Island. The finish was in need of wire brushing to remove some minimal rust spots and we found that black was a bit too dark for the aesthetic of the table to blend with the home family room location. We painted them with Rust-Oleum Universal Hammered Dark Bronze Spray Paint. Other choices for legs could have been hairpin legs, or create your own wooden legs. In either case Woodcraft has the tools and accessories for both options.


The legs did not come with hardware for assembly to the table. After measuring the hole diameters in the cast iron legs, and laying out the bottom surface of the slab for each leg location, I drilled eight 1/2" pilot holes, four per leg and inserted 3/8"-16 HIGHPOINT® Steel Slotted Drive Inserts from Woodcraft, followed by 3/8"-16 Allen Head Cap Bolts for attachment. The inserts seemed to go into the wood softly, so I applied some System Three Quick Cure-5 Epoxy to secure them into the drilled holes.


The client was overjoyed at the outcome and it was a lot of fun teaming this project with her help and input together. Live edge tables can make quite a statement, and this slab certainly has beautiful grain structure. The finish made it pop and it should get many years of useful enjoyment.

On to the next project with a trip to my Woodcraft store for my next Woodworking Adventure! As always, we are here to Help You Make Wood Work®.