
Christmastime is one of those perfect times of the year to make someone a special handmade gift. So I took to the shop after Thanksgiving, stepping away from my lathe and decided to do something different. With my daughter Maddy’s growing interest in baking, I decided to make her a heirloom Recipe Box as a Christmas gift. I purchased a Bubinga board about 6 ft.in length x 11″ wide x 3/4″ thick from Woodcraft. It had such beautiful figured grain and sort of a pink-brown color to it, perfect for my 16 year old. It has been a number of years (about 35!) since I’ve done any flat work, back in my Boardman High School days in Ohio, learning under the tutelage of Mr. Haug, my woodshop instructor. Back then I made a book shelf that still sits in my parent’s home. I’ll have to revisit that project which needs some refinishing work at some point! I remember that safety was a huge school instruction point as well as detail to your work. Coupled with the school’s drafting class, I also took Machine Shop from Mr. Orr at the high school which proved to be very valuable in my first job out of school, working at Precise Tool & Machine for 8 years. Who would have thought that 35 years later I would be woodworking and writing for a living, having more fun than I ever though possible for such a fine company as Woodcraft, and I’m still learning too!

Spending the last 2 years here at Woodcraft, writing for the Woodworking Adventures Blog, meeting so many outstanding craftsman in the field from hobbyists to professionals, I thought I needed to get more involved in what Woodcraft is truly all about, woodworking! So enough about me, let’s get to the project and how this beautiful box came to fruition.
Now I must admit, I have some of the finest folks around me to fill my knowledge cup and bounce ideas off of! Starting with a man very similar to my dad, Bill Sands of Codger Lodge and the Turning Tuesday guys I have come to be very fond of. Bill has the patience of a saint and his woodworking is impeccable. I have watched him very closely around the shop these past few years and have noticed how really safe he is around his shop. Patience not only lets you keep your numbers, but is defined as the level of endurance one can take before negativity. It is also used to refer to the character trait of being steadfast. These two lessons I have learned from Bill allowing me to completely enjoy and have fun in the building process of this recipe box. So right off the bat I wish to thank Bill with all my heart for his spirit of friendship, letting me use his equipment, and guiding me along the successful route of completion. Along with each machine and tool I used to accomplish this project, Bill also had some fine relaxing music playing in the shop, which I enjoyed immensely and a few things to snack on during my visits! Oh yeah, Bill also played blog photographer to capture the entire build process! Thank You Bill!

A few other folks I’d like to show appreciation for their ideas, assistance and knowledge base along the way are Jim Harrold, Editor in Chief of Woodcraft Magazine, who offered the idea and use of his dovetail spline jig which I incorporated in the box corners and the felt material for inside the box (in recipe box blog-Part 2). Also Shawn Staats and Kyle Camp from the Parkersburg WV Woodcraft store for their input on our General Finishes Products, Brusso Hinges and going through the rack of Bubinga Wood with me! Believe me, it’s very handy to have the Parkersburg Woodcraft store right next door to my office! They really know their stuff!
The Design-
Bill guided me on the proper order in which to build a box that had eluded me over the years. He said, “What is your design going to be?” And since I had none in mind when he asked me, he said, “Well that would be a good place to start!” He laughed, went into his house and brought me out a few examples of boxes he had previously built!
That prodded me into sitting down and designing the box. Taking a few of his ideas, and a few of mine, I came up with some initial numbers. I created a layout and had some other thoughts which would be incorporated and changed as I went along!
The first step was to decide the design and size of the box, as I wanted it to be original using my own plan and be able to incorporate hundreds of recipes, and a matching pen made from the same bubinga wood. The inside of the box would need to fit tabbed recipe card dividers of 4″x6″, with an added 1/4″ height to accommodate the divider cards tab height.
From the 3/4″ bubinga stock thickness, I wanted my wall thickness to be sturdy with no warping, yet leaving the box light enough for Maddy to handle, but strong enough to last generations to hand down to. I was sure that a 1/2″ thickness would be too thin, and Bill confirmed that he would not go any less than 9/16″. Planing the wood to 5/8″ would leave enough to sand down the final 1/16″. The inside perimeter was designed at 6-1/4″ x 4-1/2″. The exterior dimensions would end up to be 7-3/8″ x 5-5/8″ based on the 9/16″ wall thickness.
Cut & Square-


Mitered Corners-
Time to sand using a DeWalt hand sander with 220 and 320 grit papers. Note the non-slip pad under the blocks being sanded in the photo below. I highly recommend this simple yet inexpensive idea for gripping/holding your wood on the table while sanding! This pad makes the job so much easier! Sliding over to the air compressor, blowing off the sawdust, I’m ready to begin the glue up for the box wall assembly.


The Box Wall Glue Up & Clamp Assembly-


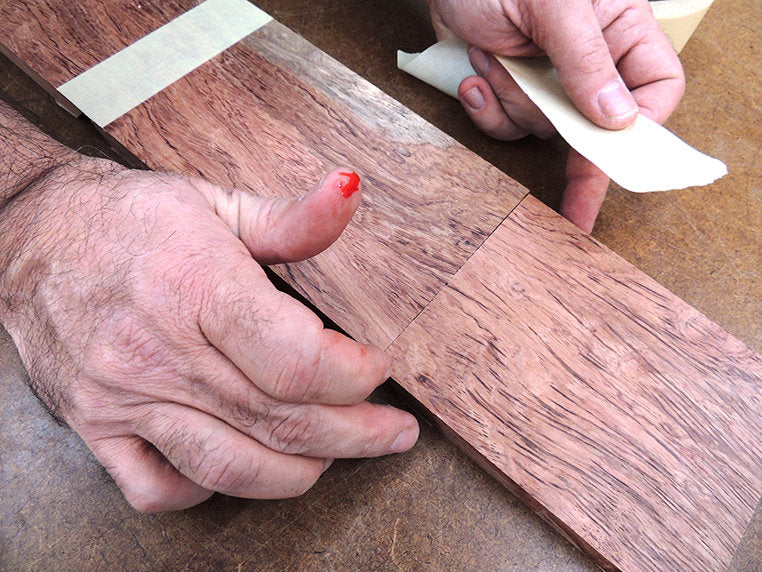
After a badly needed bandage, it was time for the glue application and roll up of the box. I had to put 3 glue applications on each of the edges as the end grain was pretty thirsty. The exterior tape not only kept the excess glue intact, but made the even roll up extremely easy and seamless.
I checked for squareness and applied all clamps, including a string/band corner clamp, placing it in the middle of the box to leave room for the Jorgensen Clamps. I also added a Bessey Bar Clamp to the top and bottom of the box corners just to make sure everything would remain square and level during the glue-up and drying time. Note in the bottom right photo below, how the excess glue lands upon the tape and not the wood!


The Lid-
Adding 9/16″ per side (1.125″ overall) to the initial box size of 7-3/8″ x 5-5/8″, I offset/marked my lines accordingly with the Dovetail Saddle Marker and cut the lid to 8.5″ x 6.75″ from the planed 3/4″ thick board I originally started with.
After cutting the top to size, I removed the string clamp from the box assembly. Gently pulling the tape from the box corners, most of the excess glue came off with the tape, however a few areas still had some glue left to scrape off. A little more sanding with 320 & 400 grit papers brings the box closer to the next step.


Notice the sap areas on the box. The lid also has this feature, which I will bring together during the build and assembly along with some other contrast design points in the next blog. So far this project was a blast and taking my time to enjoy the build and shop time made it all worthwhile. As some of the other codgers (as they call themselves) stopped by during the project build; we couldn’t wait to see how it would turn out!


So follow us along and stay linked as we bring you, The Recipe Box – Part 2: Design & Build of the Top, Sub-Base, Base & Contrast Elements.
aud Wiedersehen…Frank!


